
How to Install a Cartridge Heater Correctly and Why Thermal Paste Is Important
Cartridge heaters are widely used in moulds, packaging machines, presses, extruders, plastics processing equipment, and many other industrial applications. Although they have a compact construction, incorrect installation can cause poor heat transfer, overheating, cable damage, and a significant reduction in service life.
For efficient and safe operation, several essential rules must be followed regarding hole dimensions, surface cleaning, thermal paste application, active heating zone positioning, and electrical connection.
1. Selecting the Correct Cartridge Heater Diameter
The cartridge heater diameter must be selected according to the actual diameter of the installation hole.
As a general guideline, the heater should be approximately 0.10–0.20 mm smaller than the hole diameter.
For example, if the measured hole diameter is 10.10 mm, a cartridge heater with a nominal diameter of 10 mm may be suitable, depending on the actual tolerances of both the hole and the heater.
Excessive clearance between the heater and the hole creates an air gap that reduces heat transfer. In this situation, the internal temperature of the heater may rise excessively even though the heated part does not reach the required temperature.
On the other hand, insufficient clearance can make installation difficult and may cause the heater to become stuck inside the hole.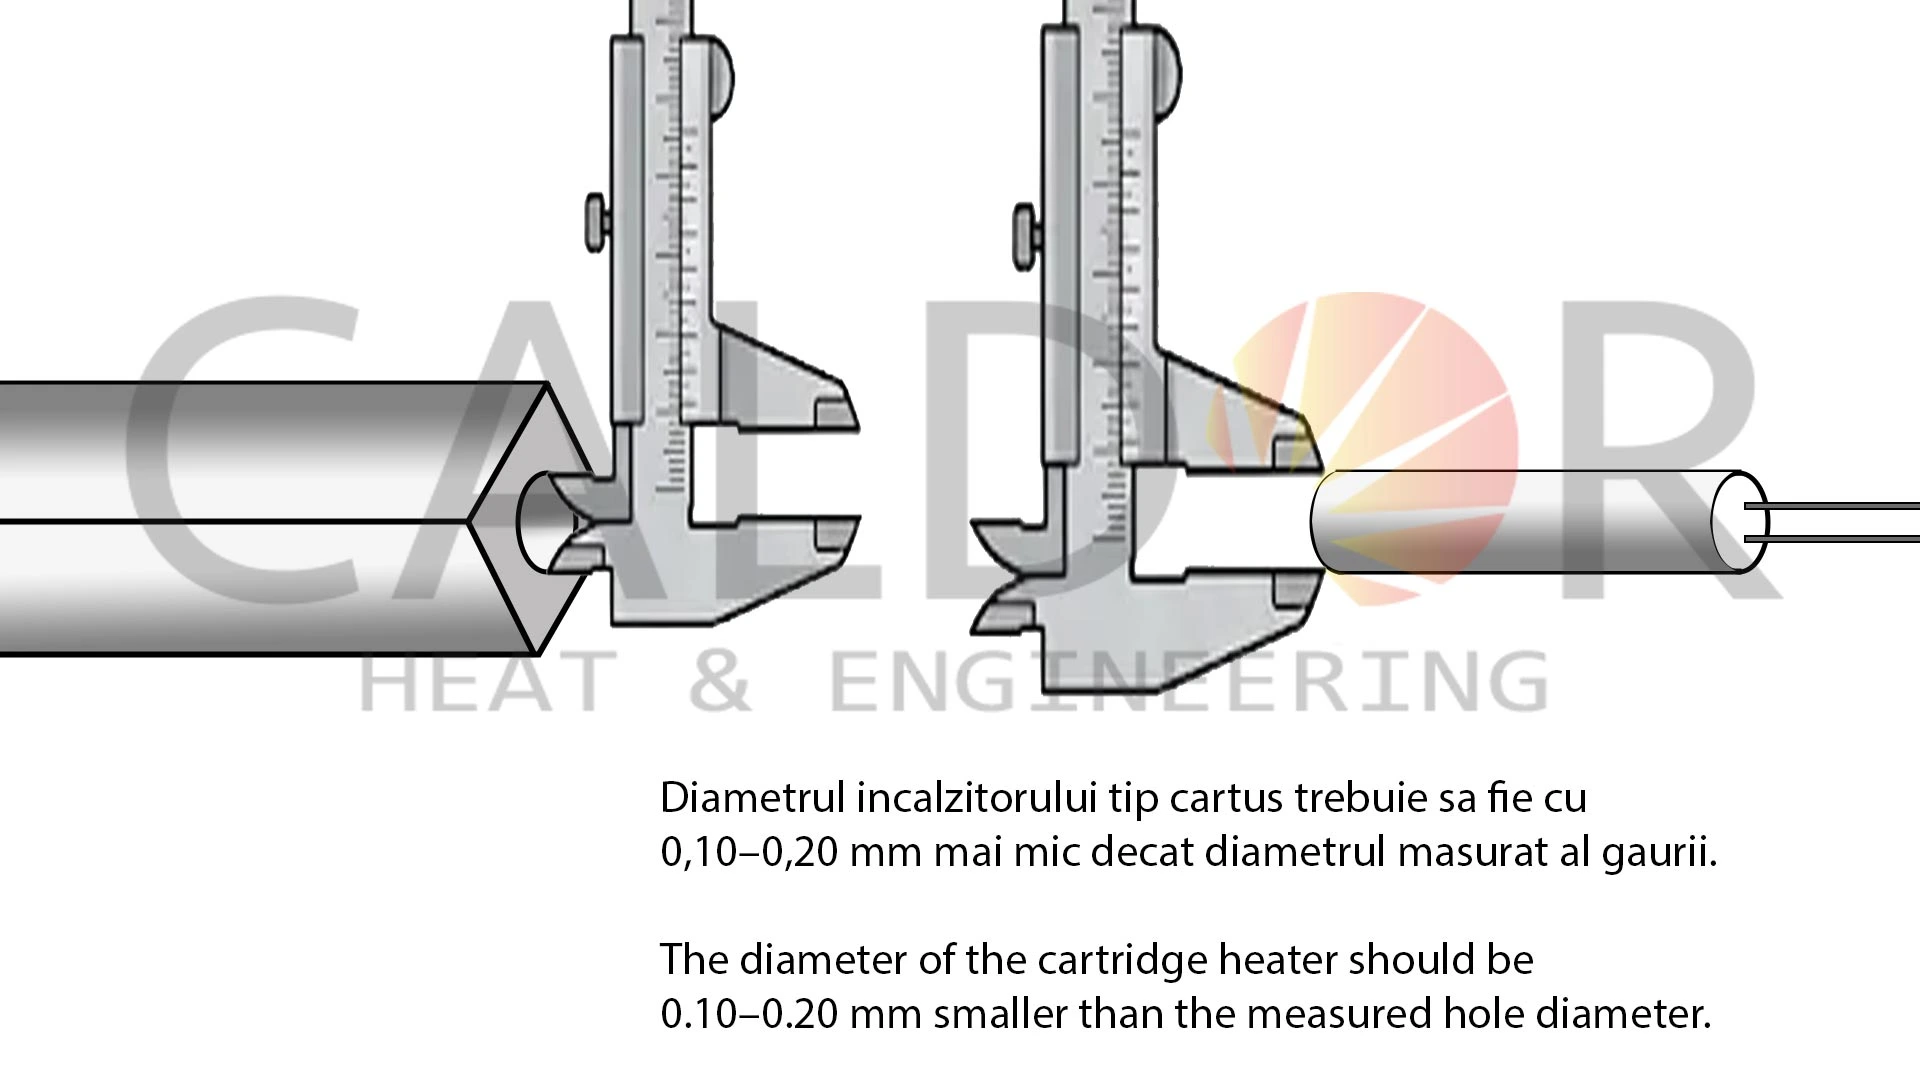
2. Cleaning the Hole Before Installation
Before inserting the cartridge heater, the installation hole must be thoroughly cleaned.
The hole must be free from:
- dust;
- metal chips;
- burnt oil;
- rust;
- production residues;
- old thermal paste;
- machining debris.
Cleaning should be carried out using a suitable brush or material that does not scratch or damage the inner surface of the hole.
A dirty hole can prevent the heater from being fully inserted and may create localised overheating points.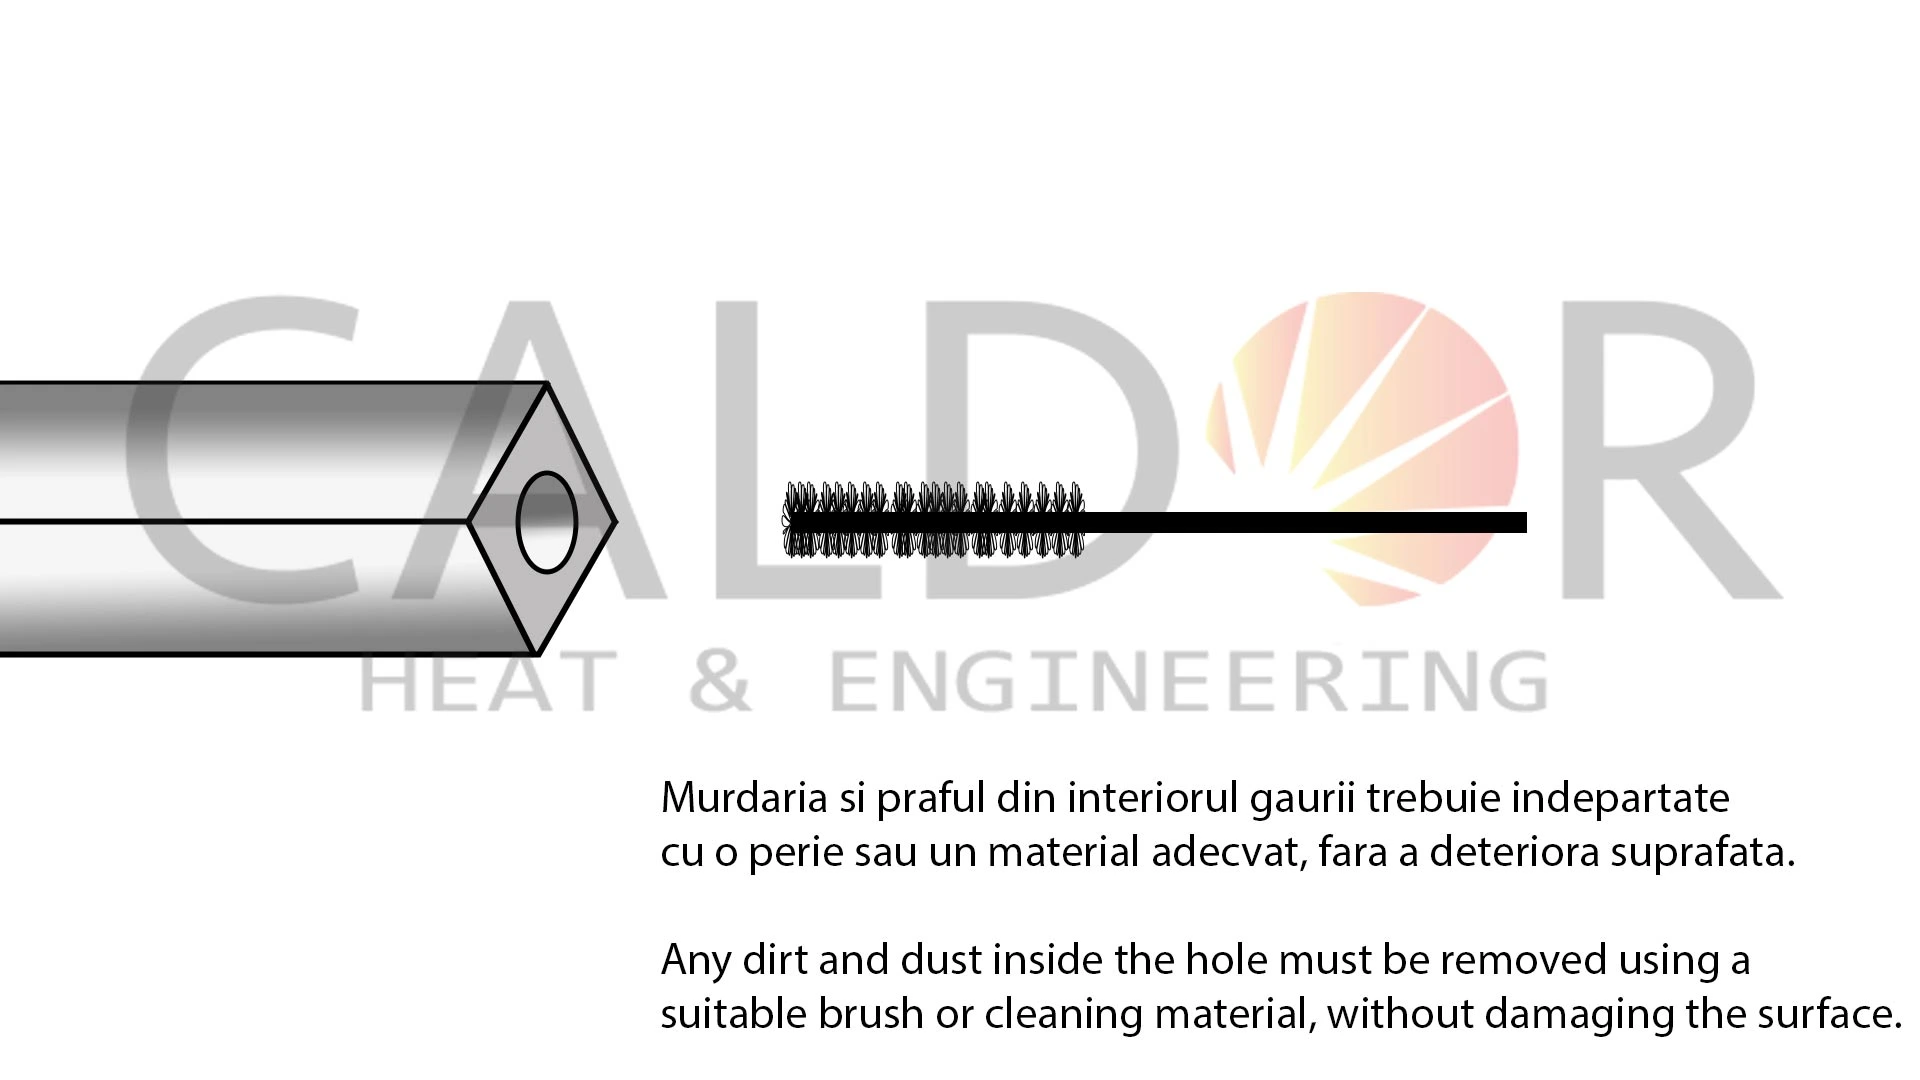
3. The Heater Must Be Fully Inserted Into the Hole
The cartridge heater must be installed so that its active heating zone is positioned inside the part to be heated.
Depending on the heater design, the cartridge should either be fully inserted or, at minimum, the entire active heating section must be surrounded by the metal body.
If part of the active heating zone remains outside the hole, heat cannot be transferred correctly to the surrounding component. The internal temperature of the heater can rise rapidly, causing insulation damage or heater failure.
The cables, ceramic termination, silicone sealing, and electrical connection area must not be placed inside the hot section unless the heater has been specifically designed for this configuration.
4. Do Not Install the Heater by Hammering
A cartridge heater must not be installed by striking it directly with a hammer.
Impact can damage:
- the metal sheath;
- internal insulation;
- resistance wire;
- ceramic termination;
- electrical cables;
- silicone sealing.
The heater must also not be inserted or removed by pulling on the electrical leads.
If the heater does not enter the hole easily, check the diameter, hole ovality, deposits, contamination, and possible surface deformation.
5. Why Is Thermal Paste Important?
High-temperature thermal paste is used to improve contact between the cartridge heater surface and the metal wall of the installation hole.
Even when the diameters are correctly selected, microscopic air gaps may remain between the two surfaces. Air is a poor thermal conductor and reduces heat transfer efficiency.
Thermal paste fills these small gaps and helps to:
- improve heat transfer;
- distribute temperature more evenly;
- reduce localised overheating;
- stabilise the heater temperature;
- reduce internal thermal stress;
- extend the heater’s service life;
- make future removal easier during maintenance.
The thermal paste must be suitable for the operating temperature and compatible with the materials used in the application.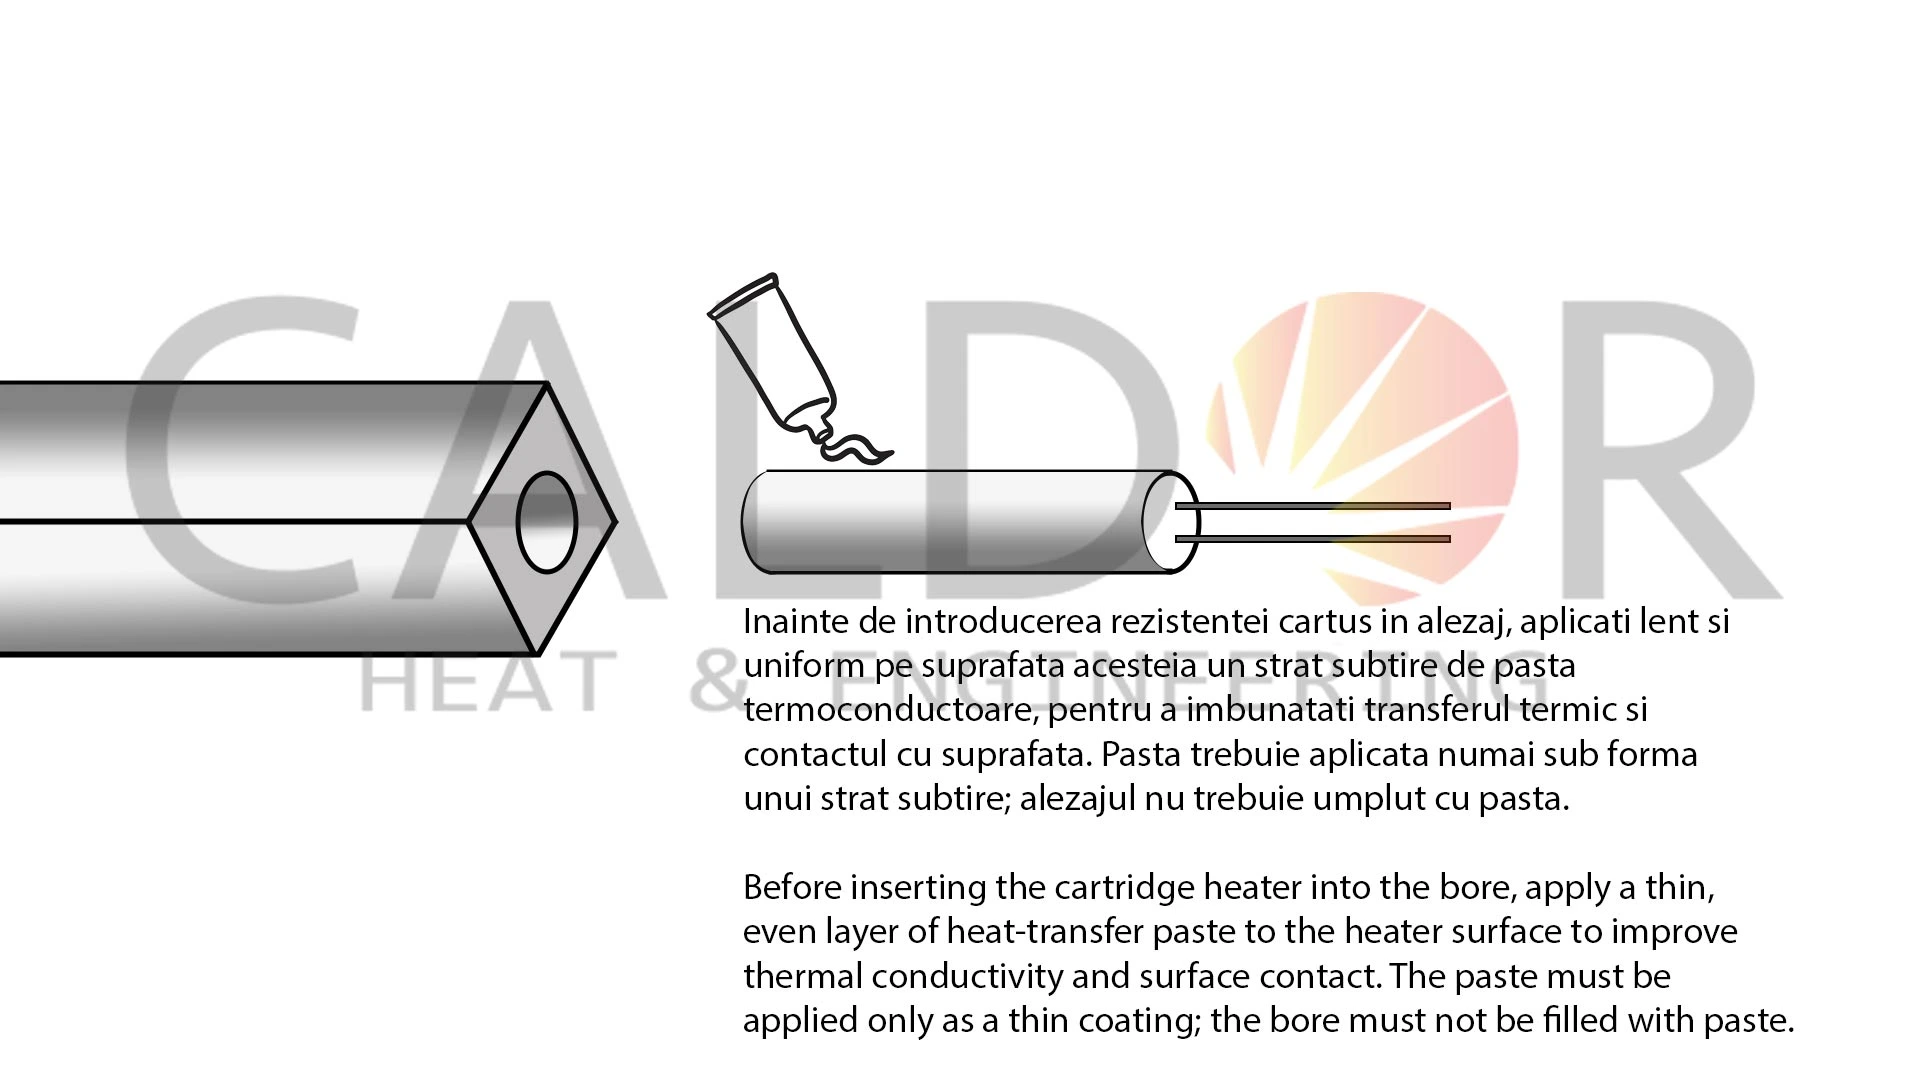
6. How Should Thermal Paste Be Applied?
Thermal paste should be applied as a thin, even layer to the cartridge heater surface or inside the installation hole, according to the paste manufacturer’s instructions.
Applying too much thermal paste does not improve heat transfer. Excess material may make installation more difficult and may accumulate around the electrical connection area.
Do not use ordinary grease, oil, or materials that are not designed for high-temperature applications.
At elevated temperatures, unsuitable products may burn, carbonise, smoke, or release unpleasant and potentially hazardous fumes.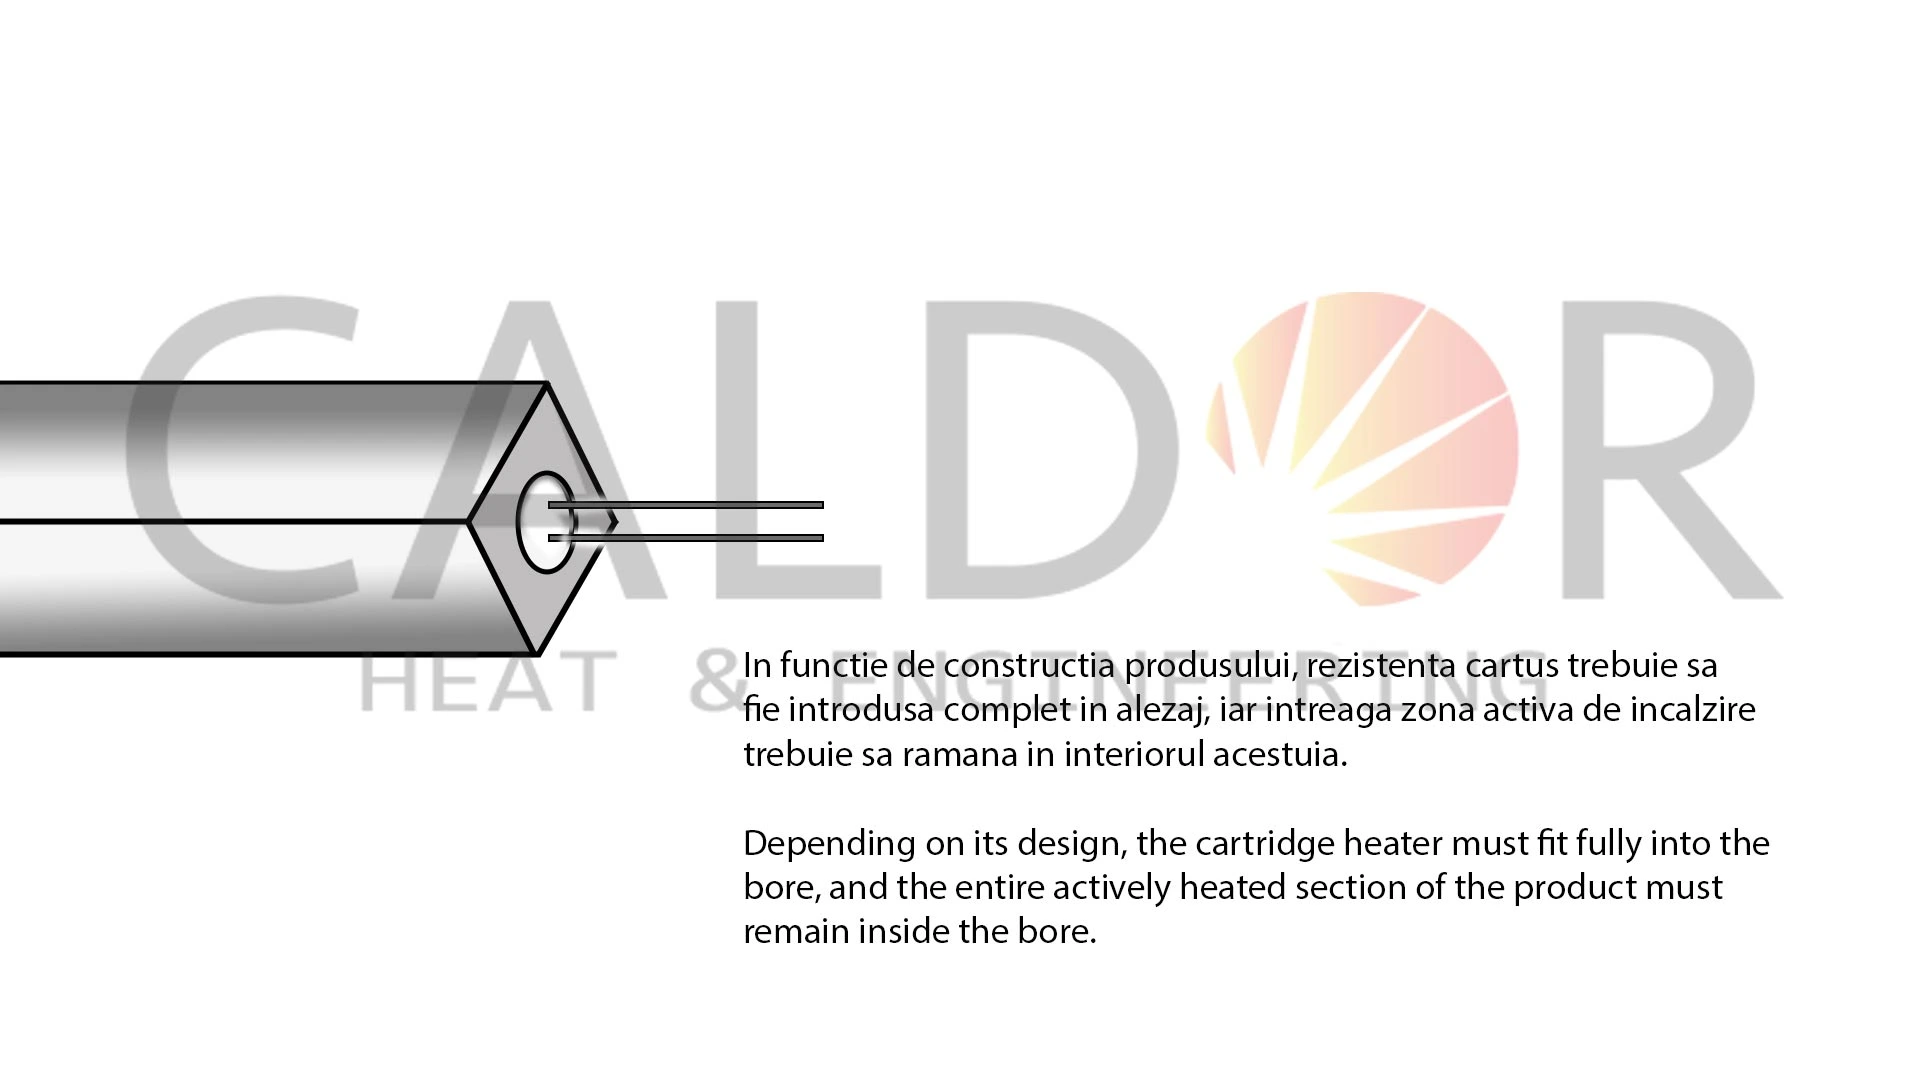
7. Inspection Before Electrical Connection
After installation and before connecting the heater to the power supply, it must be checked using suitable measuring equipment.
The following points should be inspected:
- electrical continuity;
- resistance value;
- insulation resistance between the heating circuit and metal sheath;
- cable condition;
- ceramic termination condition;
- silicone sealing condition;
- signs of impact, cutting, wear, or deformation.
If the measured values are incorrect or visible damage is present, the heater must not be put into operation.
A damaged cable, cracked ceramic termination, or weakened insulation may cause a short circuit, residual-current device tripping, or electric shock.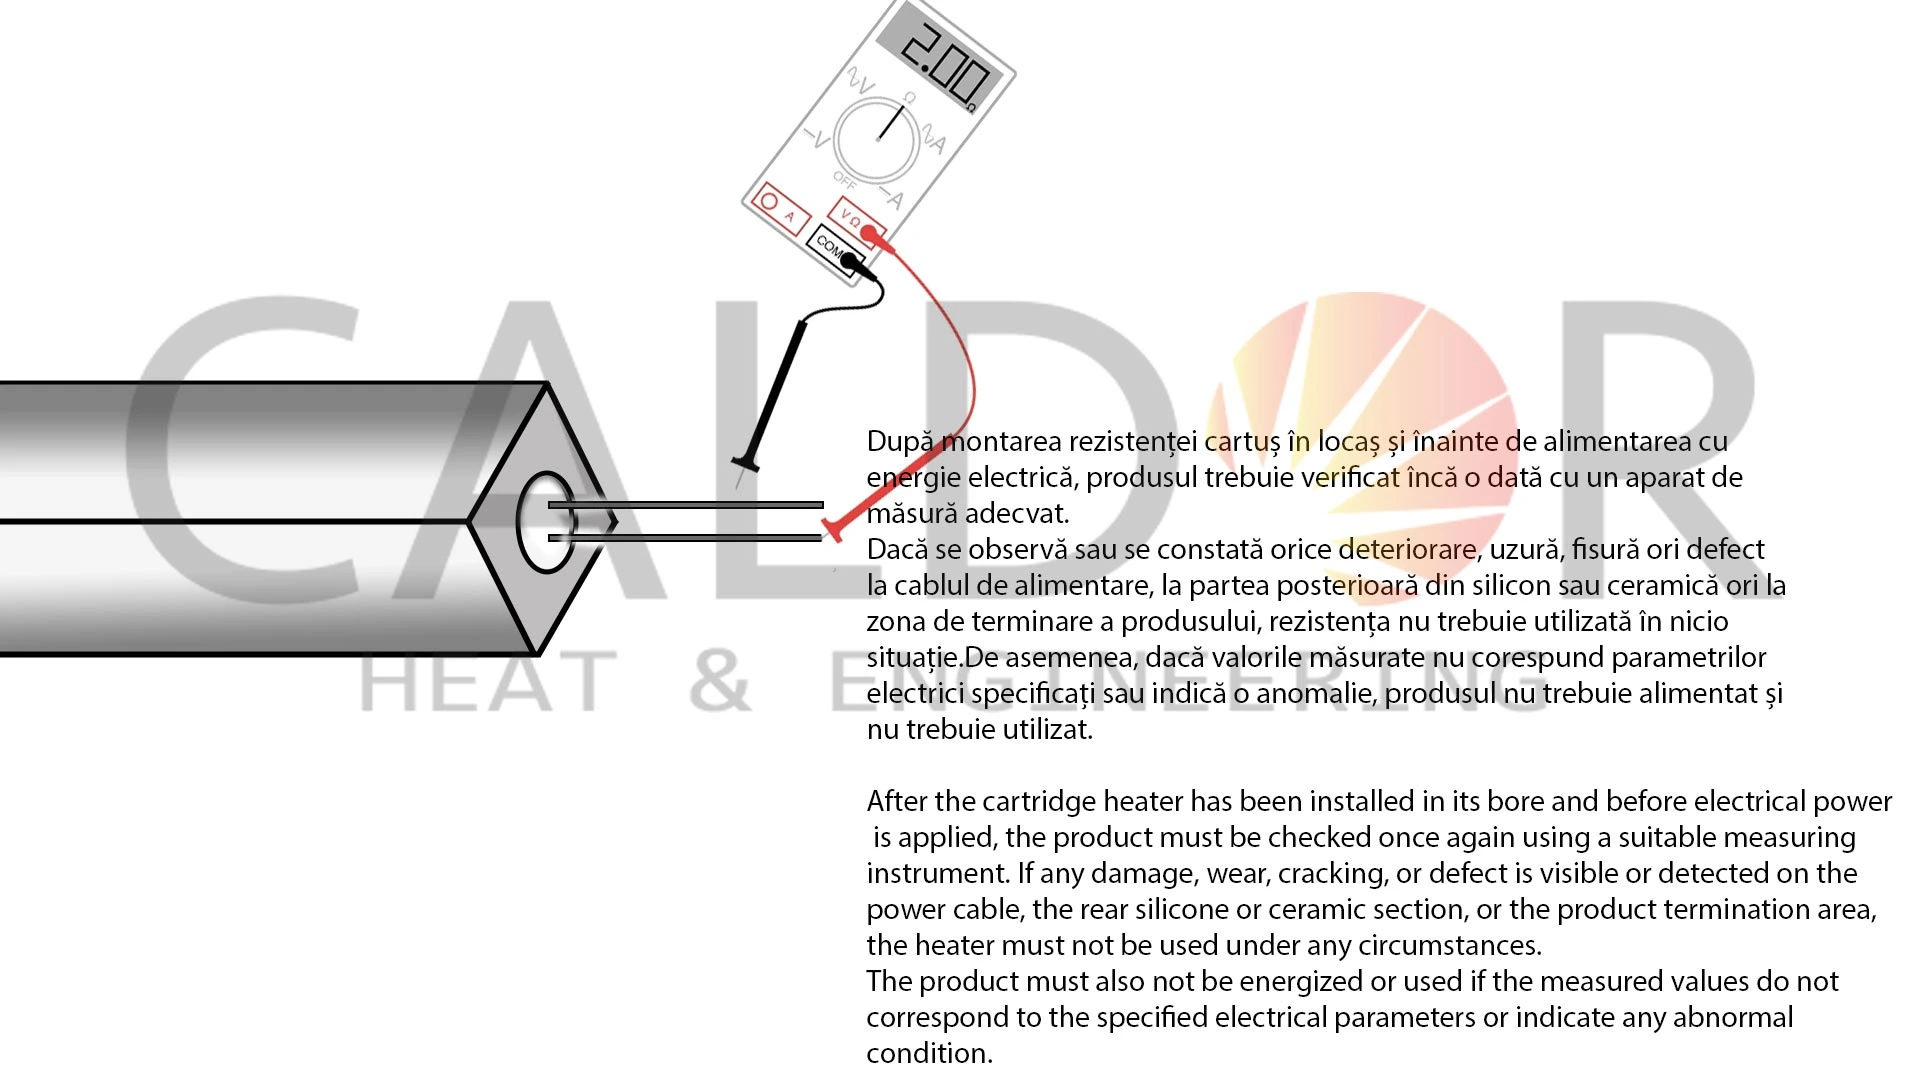
8. Electrical Connection Must Be Performed by Qualified Personnel
The cartridge heater must be connected only by a qualified electrician or authorised technical personnel.
The heater must not be connected directly to the power supply and left operating without a temperature control system.
Depending on the application, the installation should include:
- a thermocouple or temperature sensor;
- a thermostat or temperature controller;
- a contactor or solid-state relay;
- a correctly rated fuse or circuit breaker;
- residual-current protection;
- a functional protective earth connection.
The voltage, power rating, and connection type must be checked before energising the heater.
A heater designed for 230 V must not be connected to a different voltage without verifying the technical documentation.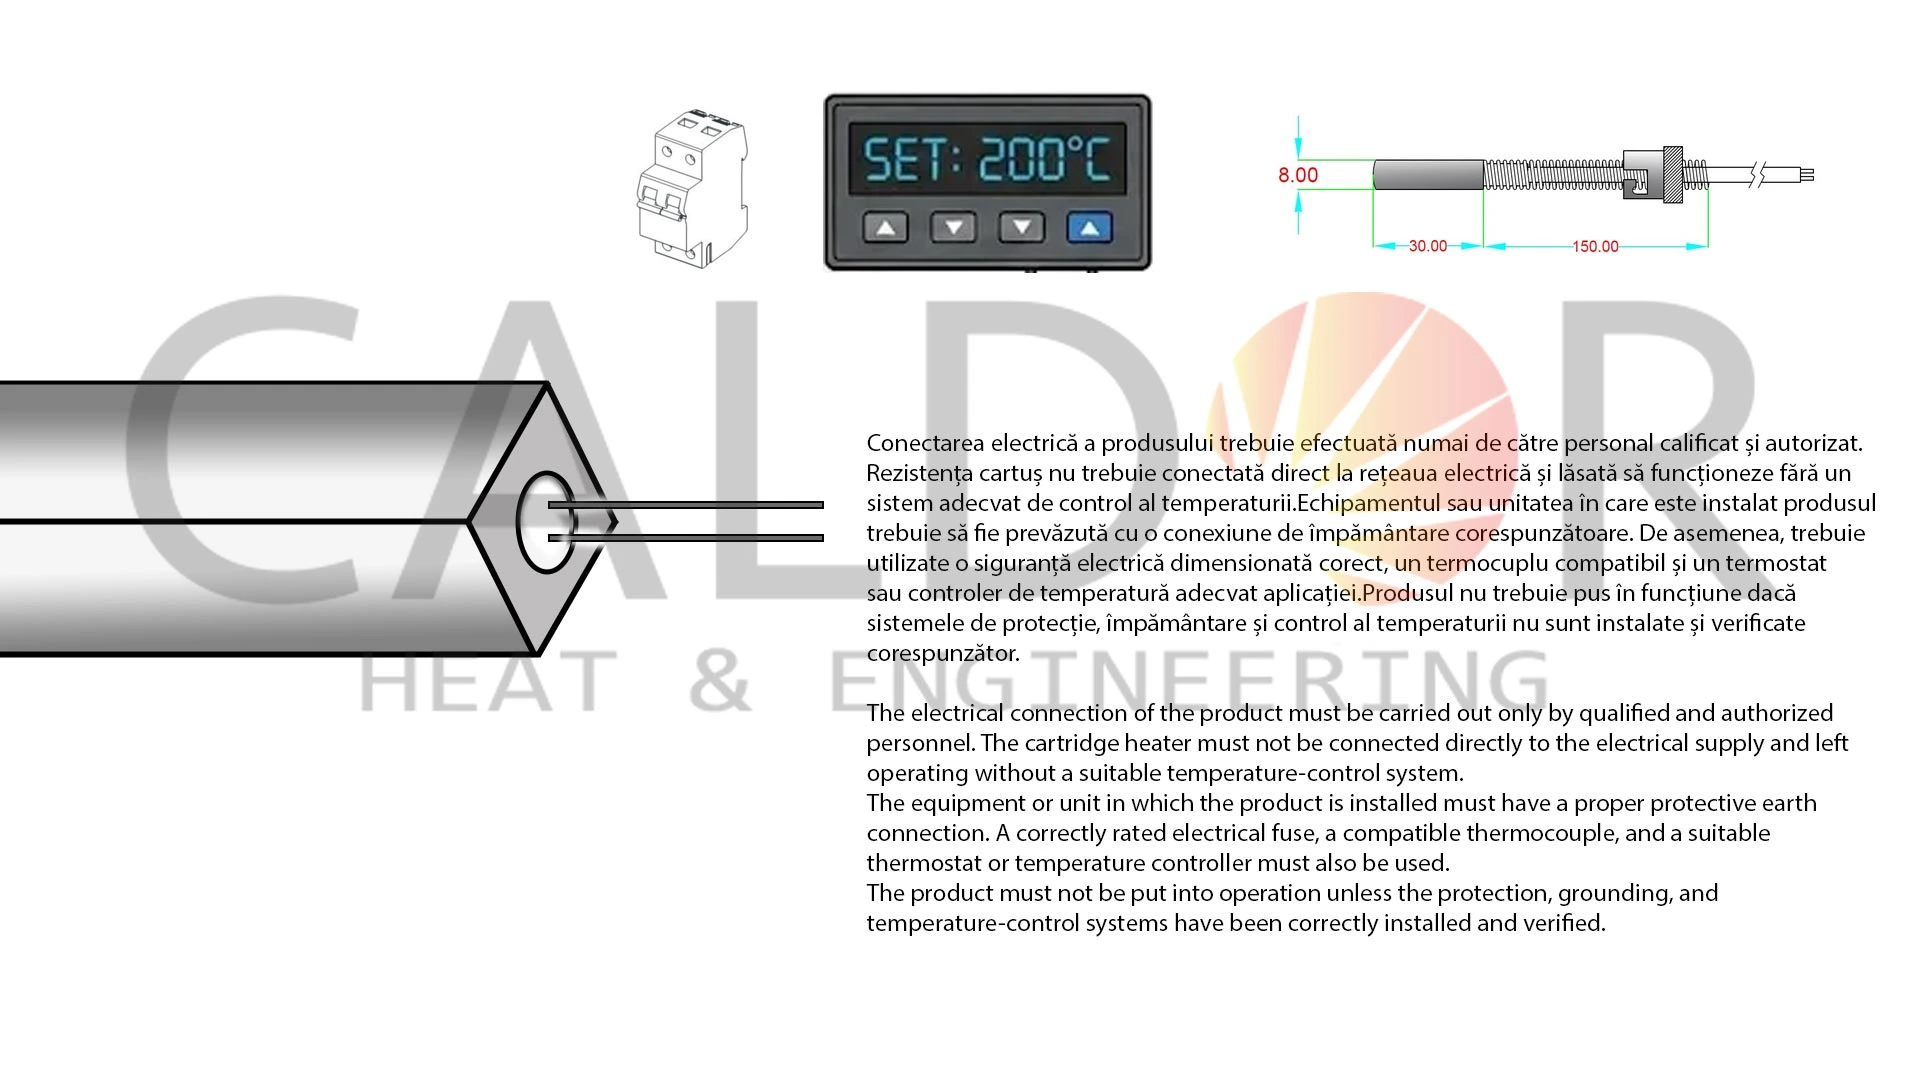
9. The Importance of the Thermocouple and Temperature Controller
A cartridge heater continues to generate heat for as long as electrical power is supplied. Without a temperature sensor and controller, the temperature may continue rising until the heater or machine is damaged.
The thermocouple should be positioned as close as possible to the area where the temperature needs to be controlled.
If the sensor is installed too far from the heater, the controller may respond too slowly. During this delay, the heater temperature may become significantly higher than the temperature measured in the metal part.
For applications with high thermal inertia, the PID controller parameters should be adjusted correctly to prevent temperature fluctuation and overshoot.
10. Protecting the Cables and Termination Area
The cable area must be protected against excessive temperature, vibration, friction, and contact with sharp metal edges.
The cables must not be:
- bent sharply immediately at the heater outlet;
- overtightened;
- trapped between machine parts;
- placed directly against hot surfaces;
- exposed to incompatible oils or chemicals.
A suitable bending radius must be maintained, especially near the ceramic or silicone termination.
In applications involving movement, the cable must be secured so that mechanical forces are not transferred to the heater termination.
11. Signs of Incorrect Installation
An incorrectly installed cartridge heater may show the following symptoms:
- slow heating of the metal part;
- unstable temperature;
- large temperature differences;
- repeated heater failure;
- discolouration of the metal sheath;
- damaged cables;
- fuse or circuit breaker tripping;
- residual-current device tripping;
- heater seizure inside the hole;
- oxidation or carbonisation marks.
In these situations, simply replacing the heater is not sufficient. The actual cause must be identified by checking the hole tolerance, temperature control, sensor position, watt density, supply voltage, and mechanical installation conditions.
12. Recommendations for Longer Service Life
For reliable operation and a longer heater service life:
- Measure the installation hole before ordering the heater.
- Maintain the recommended clearance between the hole and cartridge heater.
- Clean the hole thoroughly.
- Use high-temperature thermal paste.
- Insert the heater without hammering or pulling on the cables.
- Ensure that the active heating zone is fully positioned inside the metal part.
- Check the heater electrically before energising it.
- Use a thermocouple and temperature controller.
- Protect the installation with a suitable fuse and protective earth connection.
- Inspect cables and terminations regularly.
Conclusion
Correct cartridge heater installation involves much more than simply inserting the heater into a hole and connecting it to an electrical supply.
Hole dimensions, surface cleanliness, thermal paste, active zone positioning, electrical testing, and temperature control all directly affect system performance and safety.
A correctly installed cartridge heater transfers heat more efficiently, operates under controlled conditions, and provides a longer service life.
CALDOR HEAT ENGINEERING SRL designs and manufactures cartridge heaters for industrial applications in different diameters, lengths, power ratings, voltages, and connection configurations.